E-Commerce Product Editing in Photoshop
ecomeditingservice
How to Edit Product Pictures for an eCommerce Site Tips

How to Edit Product Pictures for an eCommerce Site - Ultimate Guide
It is predicted that eCommerce sales will make up 18% of retail sales worldwide in 2022. Such statistical data is clear evidence of the growing importance of eCommerce on the global scale. The segment is developing very rapidly and some analysts even believe that it will constitute a whopping 22% of the retail sales worldwide the next year.
This is one of the reasons why business owners are interested in photo editing tips for eCommerce. In this article, I’ll shed light on the most popular image editing techniques and will share some handy tips on how to make every product look stunning to increase conversion rates.
1. Grind Out a Detailed Plan
Any work should start with thorough planning and product photography editing is no exception. Having an in-depth plan at hand, you can always be sure you are on the right track. First of all, define what types of images you need for your eCommerce platform. It makes sense to collaborate with a skilled photographer who knows how to adjust lighting and shoot at different angles.
It is also a great idea to scan your audience and find out what people expect to see in your pictures. Besides, look through product styling tips considering to meet current trends.
To give your images a professional look, you need to find proper photo editing software. The range is impressive so choose the one that comes with all the needed functions and tools. Some programs (Photoshop, Lightroom) are available on a subscription basis, while others (Snapseed, Canva, Photoshop Express, BeFunky, Fotor) are completely free.
2. Correct Colors
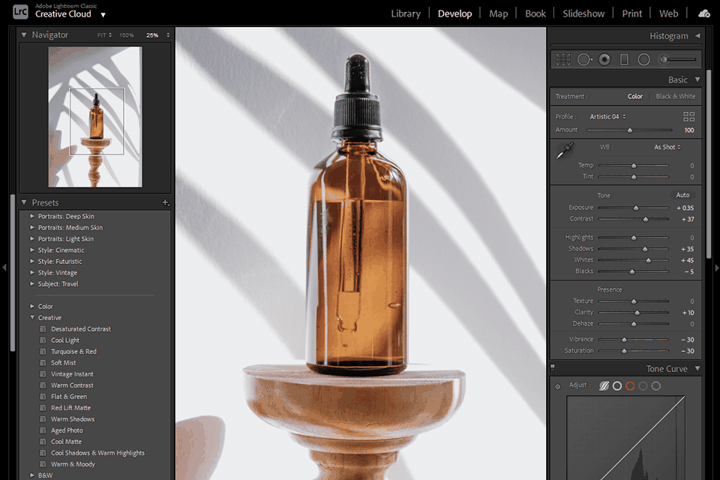
Tweaking colors in product photos isn’t that simple, but the process is obligatory. Many online stores have several items of the same design but presented in different colors. Thanks to the capabilities of modern color correction tools, there is no need to photograph all products to show a variety of colors. You can just take images of a single object and then recolor it in a specialized program. This is a wonderful time-saving eCommerce photo editing trick.
You can also use this technique to improve color tone, vibrancy, exposure, contrast, saturation, and other parameters. If you’re too pressed for time to make such corrections yourself, delegate the task to professional product retouching services.
No matter what color correction instruments you use, it is necessary to make such changes that the colors of products in photos coincide with their colors in real life. Photoshop has a pack of color correction tools with Curves Adjustment being one of the most popular options. However, keep in mind that you must perform “Color Correction” not “Color Embellishment”! People don’t like when sellers delude them with colorful pictures if actual products look different.
3. Remove the Background to Focus on a Product
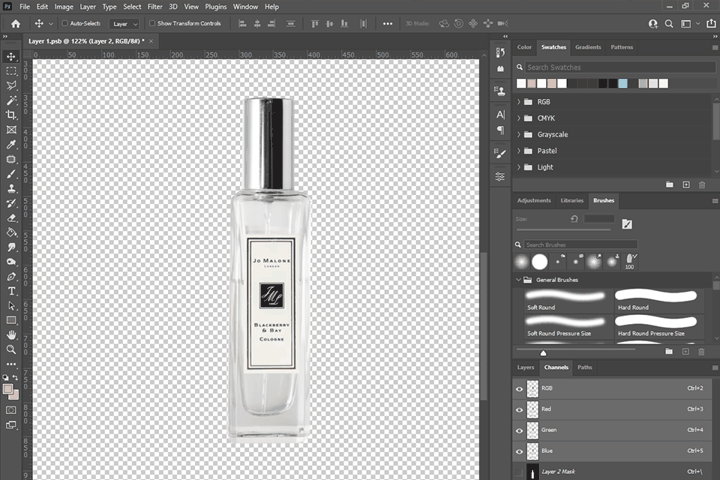
Many experienced photographers often cut out an item from its original background even if it is as neat as possible. To make the background removal process hassle-free, we recommend locating products against a white backdrop and then taking images. Such an approach is also beneficial as you’ll get a file of a smaller size, which positively affects the page’s loading speed.
In fact, background removal is a standard stage of eCommerce photo editing. By doing so, you can get rid of an unmatched background and use a new one instead to achieve consistency across a range of product images. Besides, such a modification help focus buyers’ attention on the product on sale.
Removing background, you can also achieve a polished look, which implies eliminating stray hair, scraggy threads, etc. When the original background is deleted, you can replace it with a one-color variant or keep it transparent. The choice depends on the color gamut of your products.
Pro Tip: To quickly remove the background from a photo in Photoshop, go to the “Select” tab in the top panel and choose “Color Range”. Next, use the Eyedropper to select the background color range. With the Shift key held down, you can select several shades; drag the color spread sliders to refine colors. Press Delete to remove the background. That’s it.
4. Fix Imperfections
While taking product photos, it is impossible to keep tabs on all elements in the composition. Besides, some items, e.g., dust particles, are hard to control, so you need to get rid of them during product photography editing.
Many people use Adobe Photoshop for detailed image processing. It offers lots of instruments to retouch imperfection in a convenient manner. The Healing Brush automatically matches colors and values, so you only need to choose a texture you like, and the software will do the rest.
With the help of the Clone Stamp Tool, you can select a part of a picture and then “paint” on the other area of a photo with the clone selection as a brush. This is the best method for handling imperfections located at the edges of a photo.
The Patch Tool works like the Clone Stamp but it makes a selection that can be blended over another area. Since it is aimed at blending, you’d better use it for smooth surfaces.
5. Add Shadows
Images without shadows look very unrealistic and this is hardly the effect you want to get. By adding shadows to your product photos, you can highlight the sense of space and context. We can differentiate 3 types of shadows – natural, drop, and reflection shadow.
Natural shadow is the one typically produced by an object if it is placed in direct light. The best part about adding such a shadow is that the process is very simple.
Drop shadows are ideal if you want to create the illusion that a product was photographed from above. Thus, you mimic the shadowing that appears when direct sunlight is hitting an item from the height. Drop shadows work best for furniture pieces, helping buyers imagine how a specific item will look in their house. Besides, you should stick to this kind of shadow if you take images of footwear.
Reflection shadows are used to add a bit of drama to the frame. It is a beautiful shadowing effect that lets you “place” a product on a reflective service without physically doing so. You should add this type of shadows to photos of sunglasses, watches, and jewelry to give them a special trendy look.
6. Crop Needless Items
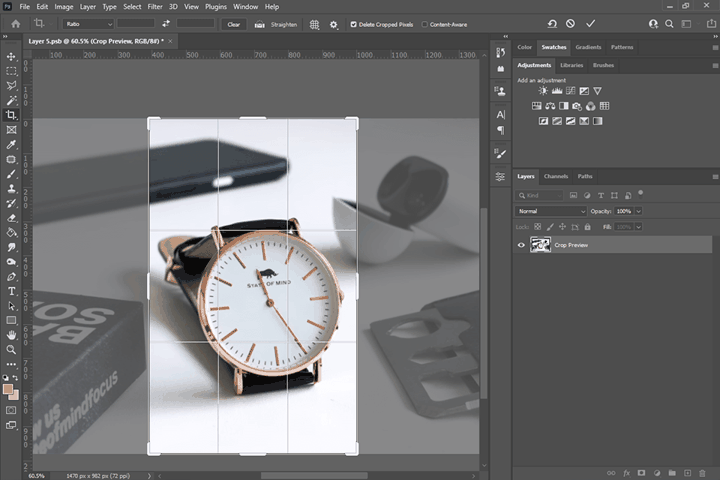
This is one of the basic photo editing tips for eCommerce, but some people still neglect it. Cropping allows removing needless pieces of a picture if you figured out they have bare no meaning after a photo session. Fortunately, getting rid of unimportant areas is easy.
In fact, photographers claim cropping is the simplest change you can make to any photo. Using intuitive tools, you can effortlessly get rid of a needless part without sacrificing the overall appeal of an image. The process usually takes several seconds.
7. Take a 3D Product Photo to Show It from All Sides
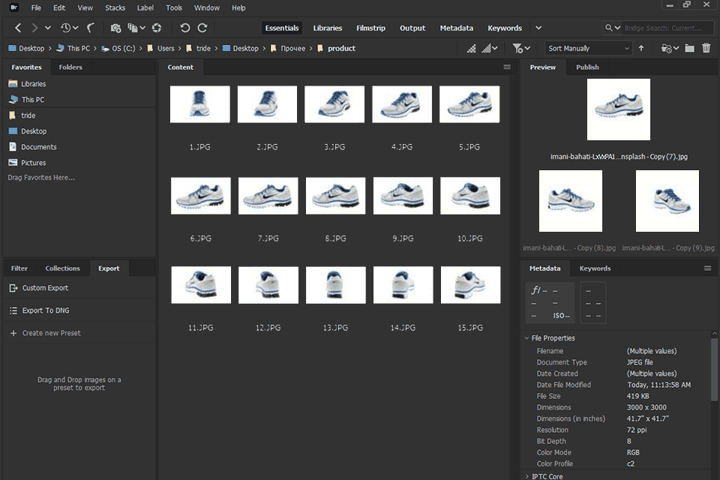
The main disadvantage of an online store is that people can’t touch a product and examine it from all sides. 2D photographs poorly convey the volume of an object and don’t allow a buyer to “feel” it. The only way out in this case is to rotate a product 360º and take 3D images. Thus, people can imagine that they are holding a tangible item.
A 360° photograph is actually a bunch of pictures of an object taken at different angles. In this case, you don’t need to rotate a camera around the object but have to place it steadily on a tripod. The only rotatable element is the product itself. Then, you need to import images into a specialized program and combine them into one 360°picture.
We recommend using Adobe Bridge for this task. Select all images, right-click on the menu and choose "Open in Camera Raw ...". There will appear an editor window. Re-select all the images and drag the Contrast and Light slider a little rightwards, using the right panel. You need to find such a position so that the background disappears and the colors in the image remain lifelike. First of all, decide what 3D photo resolution you need for your online store. For instance, you can choose 400px by 300px, which means a 4:3 ratio.
After you’ve taken and edited pictures, upload them to a program, e.g., 3D Photo Maker, to convert regular 2D images into an interactive 3D model. Then you can use it in your online store.
8. Apply a Mirror Effect for a Catchy Outcome
When you edit product pictures, you always have to make such changes that don’t affect a realistic look. Of course, images that must induce people to spend money on the items depicted, have to be eye-pleasing, but that has nothing to do with misrepresentation. The surest method to produce that “catchy” look is to incorporate a mirror reflection into the frame. If you can’t do it during shooting, why not apply a mirror effect at the image editing stage.
While in most cases a mirror effect adds profundity and strength to a picture, sometimes it is totally out of place. To understand whether it is suitable for your photo, imagine that there is initially a mirror reflection produced by your product. If it seems realistic, don’t hesitate to apply it. If not, opt for other creative touches. Besides, you can prepare a mirror reflective surface for the next photo session to get a beautiful effect straight away.
Pro Tip: When making these changes in Photoshop, you need to select the copied layer and choose Edit > Transform > Flip Horizontal. Use the mouse to change the location of the contents of both layers to create a neat arrangement. You can achieve even more accurate positioning with the help of the arrow buttons on the keyboard.
9. Remove Mannequins
Mannequins help show the exact size and shape of your products, so potential buyers can have a better understanding of what they’ll get. Of course, by shooting clothes on mannequins, you will get professional and realistic images. However, physical mannequins can become a distraction, so it is better to use a ghost mannequin effect. You will get the same accurate dimensions and shapes in photos without a distracting factor.
The “ghost mannequin” effect (“invisible mannequin”) is a popular photo editing technique that is frequently used for improving images of clothing items. It mainly serves the showcase purpose. Thus, you can take numerous pictures of a product on a model/mannequin, combine images, and remove the model or mannequin with special tools.
Pro Tip: You don’t need any profound photo processing experience to remove mannequins in Adobe Photoshop. Just open the program, select the clothing item, reverse the selection, and remove the background. Sometimes, it is necessary to combine several images. Combining this technique with a 360-degree eCommerce photo editing approach, you can get terrific images that will definitely boost conversion rates.
10. Streamline Your Work by Doing Batch Editing
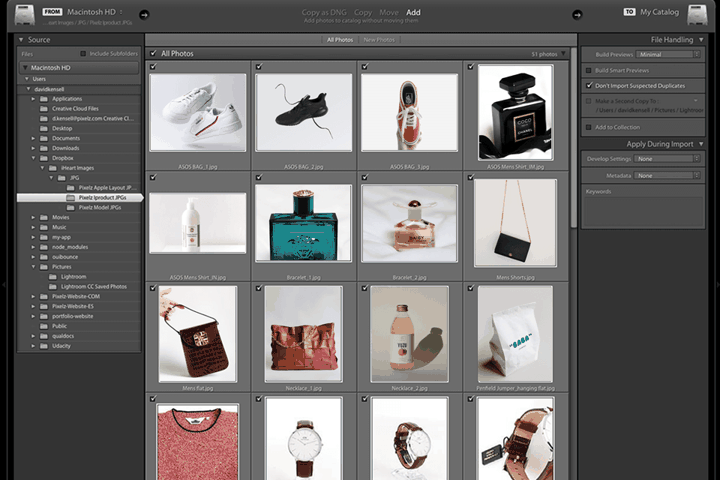
You have probably understood that consistency across the series of product photos can either make or break your selling game. People are inclined to trust those online stores where they can trace a visual uniformity in images. This is the trait of our brain and how it interprets the info perceived by our eyes. Knowing this fact, you should do all possible to create that “consistent” look, encouraging your customers to make buying decisions faster.
Getting the same color temperature, white balance, exposure, contrast, and other parameters in a pack of images is an arduous task if you try to hit the perfect balance manually. Fortunately, you can initiate batch photo processing in any program with this feature. Thus, you can speed up your image editing procedure and produce an identical feel in a group of related shots.
Pro Tip: Lightroom Presets are pre-configured effects that you can apply to photos. Thus, you can change the colors and shades of a picture with just a few mouse clicks. In addition, using presets, you can have a specific style in multiple photos. If you like the result of photo editing and you want to apply these settings to other shots, save them as your own preset. Just open the menu and select Develop - > New Preset or press Ctrl + Shift + N.
11. Optimize Your Photos to Make Loading Faster
When eCommerce photo editing is over, you need to optimize your pictures for an inline store. In most cases, the resulting files are bulky and uploading them to a website, drastically increases its load time. This is very important nowadays, as people don’t like to wait more than 5 seconds for a page to load.
Before uploading a photo to a web store, you need to check the required file size. This is a value that denotes what image can be used on a website without causing loading issues. Simply put, the smaller the photo size, the higher the load speed, and the lower the bounce rate. To play it safe, use pictures of 1-2MB in size.
Moreover, eCommerce photos should be at least 2000px on the longest side so that 1) users can zoom in on a picture if needed and 2) you can share them on the most popular online marketplaces without problems.
Final Thoughts
Following eCommerce image optimization tips, you can create an online store that is a total delight to visit. Considering the tough competition in the eCommerce sphere, you need to go the extra mile to retain your clients and attract new ones. The success of your platform much depends on its visual filling. Since people can’t touch the products you offer, you need to provide them with as much information about an item as possible with the help of photos.
Moreover, you should devote enough time to eCommerce photo editing to correct colors, remove distractions, fix defects, and create an eye-pleasing image. Following the tips shared in this article, you are bound to achieve the desired result.

Comments
Post a Comment